


Coating the emulsion: layer thickness and technique
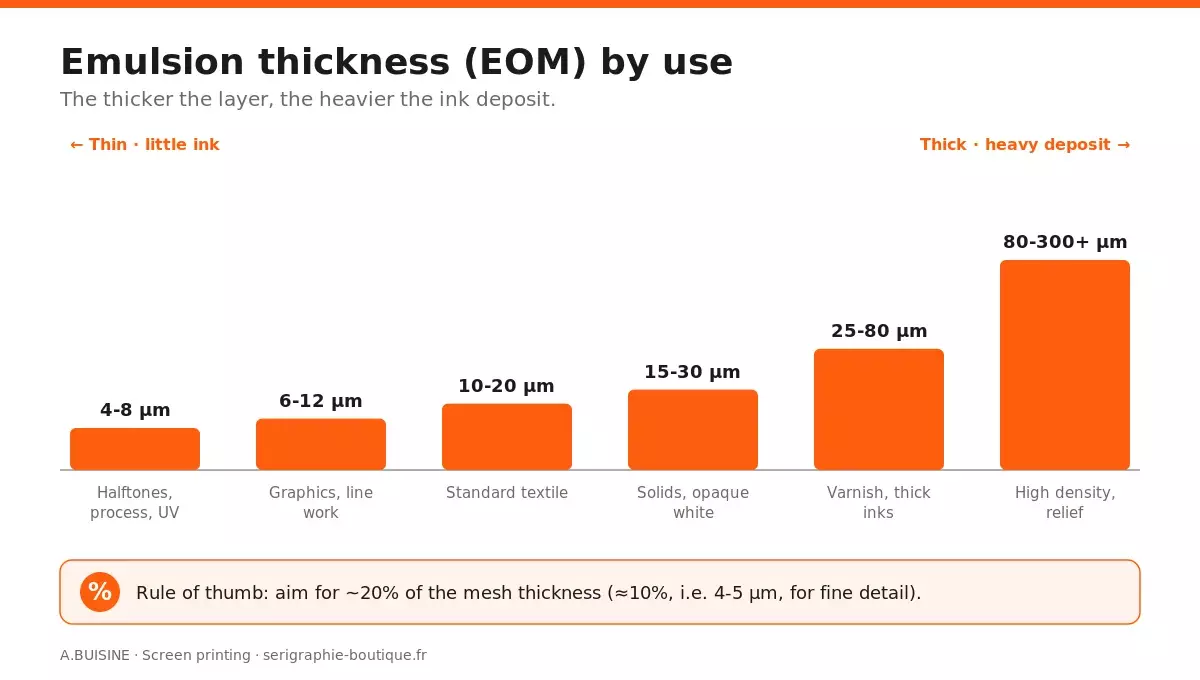
Direct answer: coating means applying the emulsion layer onto the mesh, after degreasing. This layer must be as even and uniform as possible. Its thickness — the EOM (Emulsion Over Mesh) — drives print sharpness and the amount of ink deposited: the thicker the layer, the deeper the ink reservoir above the mesh and the heavier the deposit; the thinner it is, the less volume available and the lighter the deposit.
Most emulsions can be coated in a lit room — except fast emulsions — provided you work quickly and store the screen away from light right after.
How thick should the emulsion (EOM) be?
The target thickness depends on the application:
| Application | Typical EOM thickness |
|---|---|
| Fine halftones, process, fine detail, UV, paper/plastic | 4 to 8 µm |
| Standard graphics, line work, small text | 6 to 12 µm |
| Standard textile printing | 10 to 20 µm |
| Textile solids, opaque white, plastisol, opaque ink | 15 to 30 µm |
| Varnish, glue, thick inks, light special effects | 25 to 80 µm |
| High density, relief, gel, tactile, technical deposits | 80 to 300+ µm (often capillary film or special emulsion) |
A common rule: for general printing without extreme detail, aim for about 20% of the mesh thickness in EOM. Example: for a 50 µm thick mesh, look for about 10 µm of emulsion above the mesh. For fine detail, halftones, process or UV, go down towards 10%, often around 4 to 5 µm minimum.
For very precise work, don't overload the emulsion: too thick a layer causes loss of detail, poor clearing of small dots, smearing or poor ink release. Conversely, too thin a layer makes a poor "gasket" with the substrate, causing jagged edges, smudging, loss of highlight dots or shadow gain.
For thick deposits, capillary films or high-viscosity emulsions are often used. Common capillary films range from about 18 to 80 µm, and some "thick film" products go up to several hundred microns. Note (Murakami): films of 20 µm or more suit capillary application, while very thin 7-15 µm films can be too fragile in that mode.
In practice, for a textile shop: fine mesh, detail or halftone → 5 to 10 µm; standard t-shirt → 10 to 20 µm; opaque white or large solid → 20 to 30 µm; relief or high-density effect → 50 µm and up, with a suitable product.
It's best not to think only in terms of "number of coats": the result depends on the mesh, the coating trough, the emulsion solids content and the method. Two shops can do "1+1" and get very different thicknesses. The ideal is to measure with a stencil thickness gauge (micrometer).
The steps
1. Work in reduced light
In the shop, fit safe (UV-free) lighting in the room.
2. Load the coating trough
Spread the emulsion across the full width of the trough.
3. Coat both sides
First the print side (substrate side), then the squeegee side. Several passes increase the layer thickness.
4. Get an even deposit
If you're new to the move, scrape off the excess for a smooth layer.
5. Dry flat, print side down
Away from light and dust. Drying orientation is key: gravity must build the layer on the substrate side.
Frequently asked questions
How many coating passes?
It depends on the emulsion, the mesh and the result you want. Not every emulsion suits a thick layer — take that into account, then record the recipe that works best for your job.
Why is my coating grainy?
Poorly mixed emulsion (for a two-part emulsion, always wait 4 hours before use), poorly degreased mesh, or a damaged trough: check these three points.
Uneven coating?
Check that the coating trough isn't damaged: its edge must be perfect.
Does more emulsion always mean more quality?
No. Too much EOM closes up detail and lengthens exposure; too little reduces the gasket and encourages smearing.
Advanced details Coating settings
| Parameter | Starting value | Adjust if… |
|---|---|---|
| Fine-detail profile | 1+1 or 1+2 depending on emulsion | Closed detail: reduce the layer or exposure time; weak edges: increase slightly. |
| Opaque textile profile | 2+2 or 2+1 depending on mesh | Aim for a more robust stencil, often 15-20% EOM for opaque whites. |
| Coating trough | Clean, un-nicked edge | A damaged trough creates streaks and over-thickness. |
| Drying orientation | Print side down | Promotes a smoother substrate-side surface and limits dust. |